3D Printing
For our 3D Printing Session, our objective was to design an object that could not be made Subtractively.
After some failed brainstorming and searching online, I decided to follow this guide on Youtube, where he makes a cool looking pencil holder. This pencil holder cannot be made subtractively as cutting out the design along the curved surface of the pencil holder.
Link to the video can be found here
From the Top view, sketch a circle with a diameter of 70mm.

Step 2:
Extrude the circle by 90mm to form a cylinder.

Step 3:
Use the shell function to hollow the cylinder while leaving a 4mm gap.


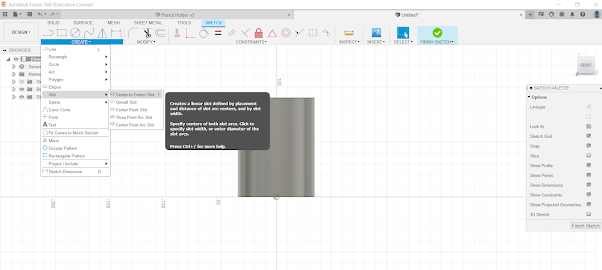
Step 4:
Create a Slot sketch and adjust its position where it is going to go on the pencil holder.


Step 5:
Use the Emboss tool to emboss the slot design onto the cylinder.


Step 6:
Use the Circular Pattern Function to repeat the slot design all around the cylinder 10 times.


Here's the Finished Design:

In Cura, the product in its original size would take well over our restricted time of an hour's 3D printing time, which required me to downscale it. After a bit of tweaking, I managed to reduce its printing time to 49 minutes. Here are the settings I used:

Here's how the printed product looks:

Banana For Scale

My Hero Shot

The link to the .f3d and .stl files can be found here:
Reflection:
During this 3D printing practical, I got to utilize the 3D printing software Cura to design and 3D print an object that I designed, and also got to see the 3D printer in motion, printing out my object, which was overall a very interesting and unique experience for me. I had always been interested in 3D printing objects that I find on the internet, and with the introduction of the presence of 3D printing being a possibility in school, I hope that i would be able to find time to come to the lab and 3D print more objects in the future.


Comments
Post a Comment